
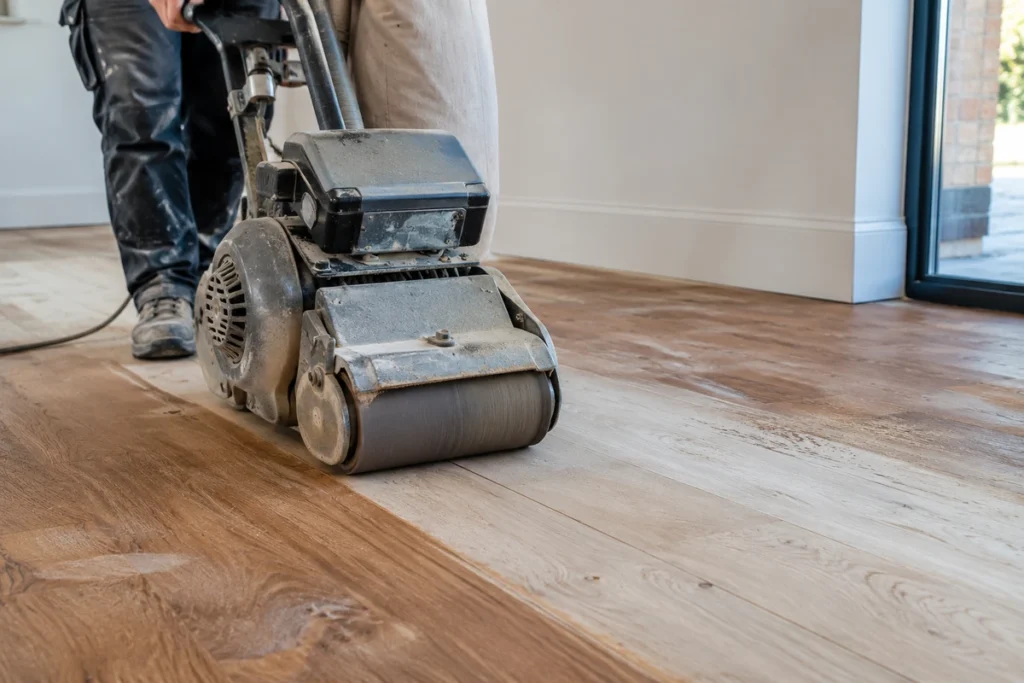
Can You Sand Engineered Wood Floors?
Yes, you can sand engineered wood floors if the remaining real-wood wear layer is thick enough. However, not every engineered floor can be sanded safely. The National Wood Flooring Association (NWFA) generally advises against sanding when the remaining wear layer is less than approximately 2.5 mm
Unlike solid hardwood, engineered flooring has a limited amount of natural wood above its supporting core. Sanding too deeply can permanently damage this surface, making plank replacement necessary.
Before refinishing, you need to consider the wear layer thickness, previous sanding, floor condition, and manufacturer’s recommendations.
This engineered wood sanding guide explains how to determine whether your floor is suitable for sanding, when a lighter recoating treatment is preferable, and how professionals refinish engineered hardwood without unnecessarily removing valuable wood.
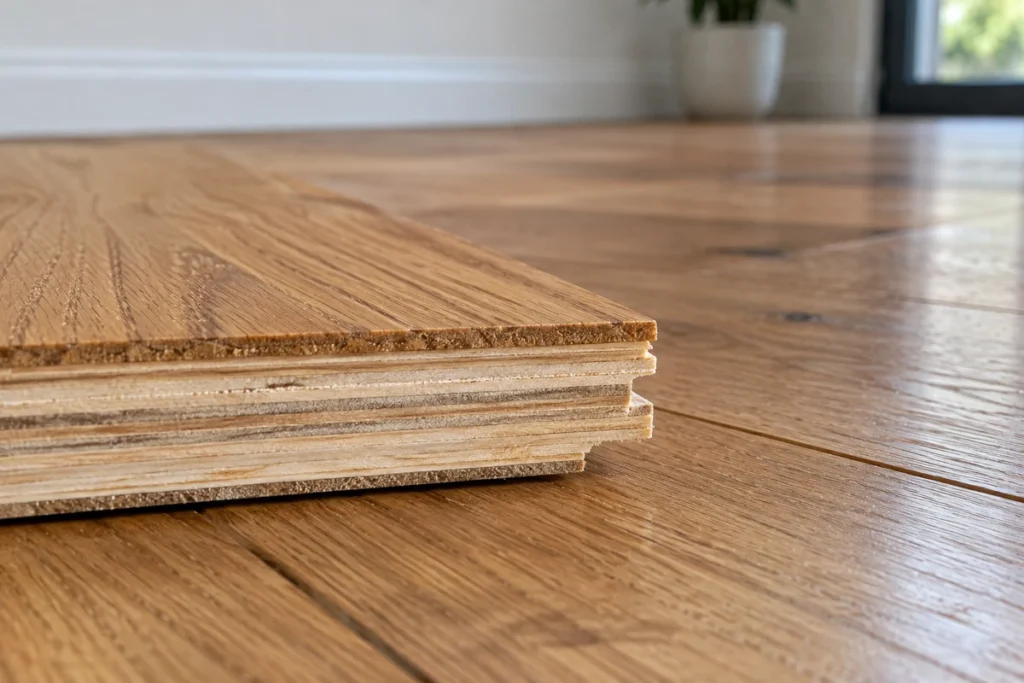
How Does Wear Layer Thickness Affect Sanding?
The wear layer is the uppermost layer of real hardwood bonded to the supporting core of an engineered floor. It provides the natural grain, colour, and texture visible on the finished surface.
Unlike the plywood or composite layers underneath, this hardwood surface can potentially be sanded to remove scratches, stains, and worn finishes.
The important measurement is the remaining wear layer, not the total thickness of the plank.
For example, a 15 mm board with a 2 mm hardwood surface has less sanding potential than a 12 mm board with a 4 mm surface
Wear Layer Thickness and Sanding Potential
| Remaining Wear Layer | Sanding Potential | Recommended Approach |
|---|---|---|
| Below 2 mm | Not suitable | Consider compatible recoating or plank replacement. |
| 2–2.4 mm | Generally too thin | Avoid full sanding; assess alternative treatments. |
| 2.5–3 mm | Potentially sandable | Professional inspection and careful sanding are essential. |
| 3–4 mm | Better sanding potential | Full refinishing may be possible if the floor is suitable. |
| Above 4 mm | Greater refinishing flexibility | Multiple refinishes may be possible, depending on remaining thickness and condition. |
These are general assessment ranges, not guarantees. The NWFA’s Engineered Wood Flooring Refinishable Program establishes minimum wear-layer requirements of 2.5 mm for factory-finished smooth products and 3.2 mm for unfinished smooth products
Why isn’t there a fixed number of sanding cycles?
Every sanding removes some hardwood. The amount depends on surface damage, floor flatness, equipment, sanding technique, and previous refinishing.
Uneven boards or deep scratches may require more material removal than a lightly worn surface. Consequently, two floors with identical original wear layers can have different remaining refinishing potential
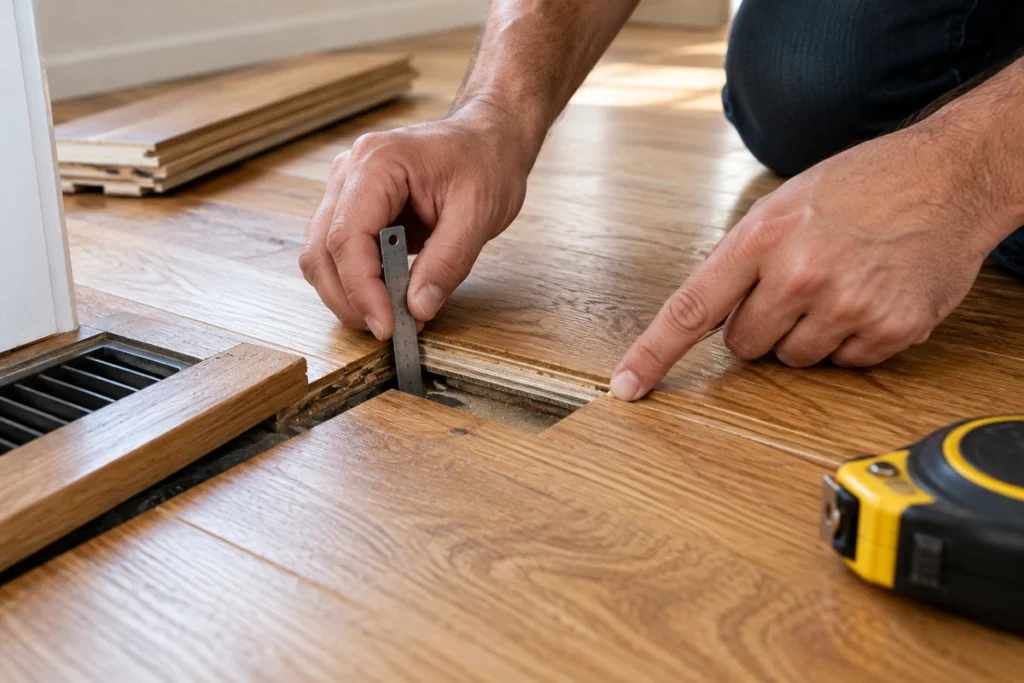
How to Tell If Your Engineered Wood Floor Can Be Sanded
Before sanding engineered wood, confirm that the floor has sufficient hardwood remaining and is structurally suitable for refinishing.
1. Check the Manufacturer’s Specifications
Start with the product’s technical data sheet, installation instructions, or maintenance documentation.
Look for:
- Original hardwood wear layer thickness
- Manufacturer-approved sanding methods
- Refinishing restrictions and warranty conditions
- Factory finish type and recommended treatments
If you’re comparing European flooring collections, check individual product specifications rather than assuming all premium products are sandable.
Some engineered wood products have thick hardwood surfaces suitable for refinishing, while others use thin veneers that should never be sanded.
2. Measure the Remaining Wear Layer
Where possible, examine an exposed plank edge beneath a removable threshold, transition strip, or floor vent.
The hardwood layer should be distinguishable from the supporting core.
A flooring professional can measure this layer using appropriate tools. Measurements should account for previous material removal and any variation across the floor.
Never assume the original manufacturer’s thickness still remains, particularly when the floor’s maintenance history is unknown.
3. Inspect Previous Sanding and Floor Condition
Previous refinishing reduces the available hardwood surface.
Check for deep scratches, exposed core material, uneven boards, loose planks, delamination, or moisture-related damage.
Sanding is unsuitable when the hardwood surface is already excessively thin or the boards are structurally compromised.
If the floor has experienced moisture damage, identify and resolve the cause before considering refinishing.
4. Consider Installation, Bevels, and Factory Finish
Installation and surface design also affect sanding suitability.
Glued-down floors generally provide a more stable surface, while floating installations require additional assessment.
Deep bevels, textured finishes, and uneven plank edges may require more aggressive sanding to achieve a uniform appearance.
Factory-applied finishes, including aluminium-oxide-enhanced coatings, can also require specialized abrasion techniques.
A professional should assess these characteristics before selecting equipment or attempting to remove the existing finish
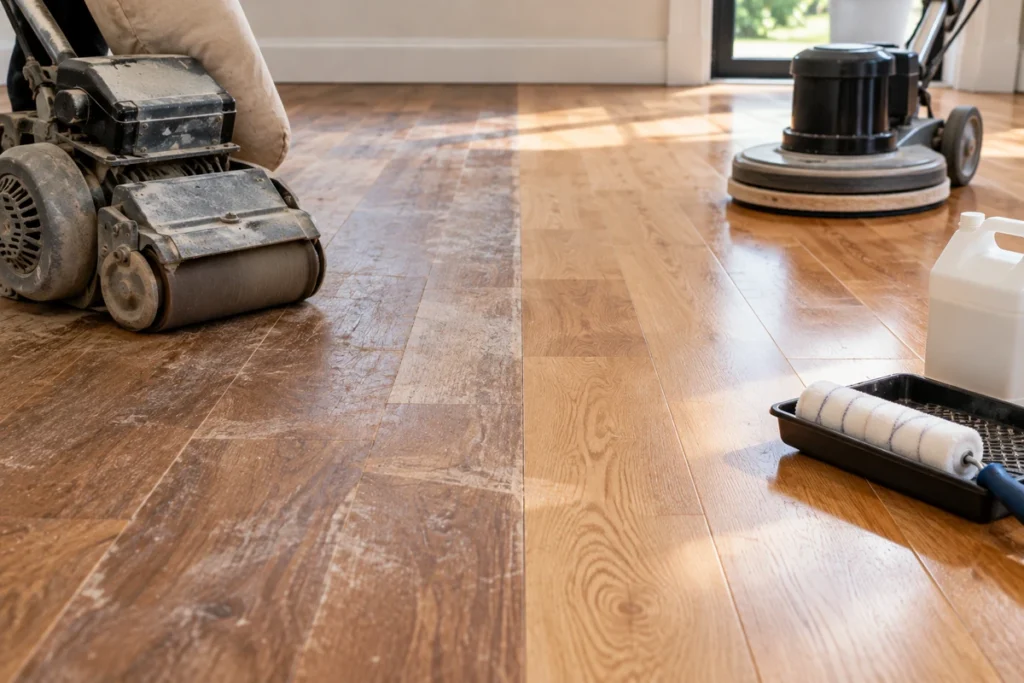
Sanding vs. Screening and Recoating: Which Is Better?
Full sanding removes the existing finish and a small amount of hardwood, while screening and recoating primarily refreshes the protective coating without removing significant wood.
The appropriate treatment depends on the type and depth of damage.
Choose full sanding and refinishing when:
- Scratches extend into the hardwood surface.
- The existing finish is severely worn or damaged.
- Surface staining requires controlled wood removal.
- You want to change the appearance of the natural hardwood.
Full sanding is only appropriate when sufficient wear layer remains.
Choose screening and recoating when:
- Scratches are limited to the protective finish.
- The floor looks dull but remains structurally sound.
- The existing coating is intact and compatible with recoating.
- You want to refresh the appearance without unnecessarily removing hardwood.
Screening lightly abrades the existing coating to support adhesion. However, some factory finishes and maintenance products require specialized preparation, and an adhesion test may be necessary
Choose plank replacement when:
- Sanding would expose the supporting core.
- Boards are swollen, delaminated, or severely damaged.
- Deep damage cannot be removed safely.
- Only a few planks require substantial repair.
For minor surface wear, proper wood floor maintenance can delay refinishing and preserve the available hardwood layer.
Regular cleaning, suitable protective products, and prompt treatment of spills also help extend the appearance and service life of wooden flooring
How to Sand and Refinish Engineered Wood Floors Safely
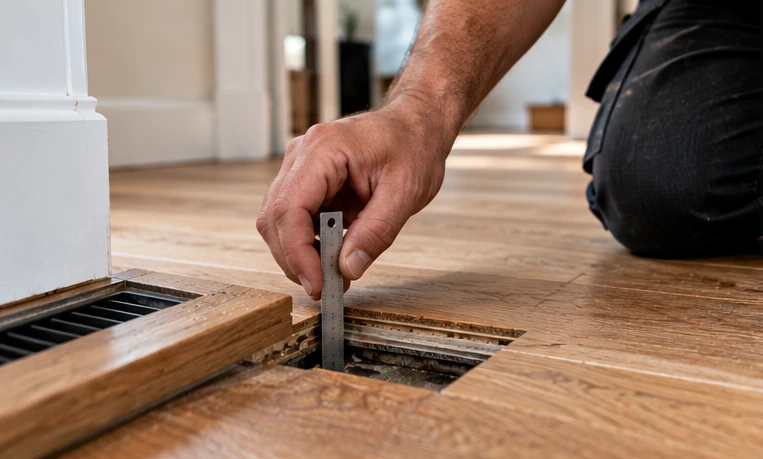
Step 1: Confirm Sanding Suitability
Verify the remaining wear layer, inspect the boards, and review manufacturer recommendations.
Assess moisture conditions, floor stability, and previous sanding history.
In Dubai and other parts of the UAE, maintaining stable indoor conditions is particularly important where air conditioning and changing humidity affect the flooring environment.
Do not sand a moisture-damaged or unstable floor until the underlying problem has been resolved.
Step 2: Prepare the Room and Flooring
Remove furniture, rugs, and movable objects.
Inspect loose boards, protruding fasteners, and damaged areas requiring repair.
Protect adjoining surfaces and establish effective dust extraction and ventilation arrangements.
A small test area can help determine the appropriate sanding approach.
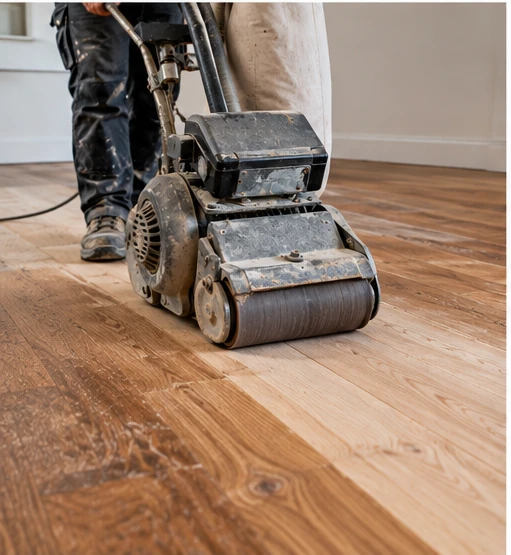
Step 3: Sand the Surface Carefully
Professionals select suitable equipment and use controlled abrasive passes to remove the existing coating and necessary surface imperfections.
The objective is to remove as little hardwood as possible.
Aggressive sanding, excessive pressure, or unnecessary levelling can significantly reduce the remaining wear layer.
Edges and corners require particular care because repeated sanding can remove material unevenly.
Step 4: Clean and Apply a Compatible Finish
After sanding, thoroughly remove dust and inspect the prepared surface.
Depending on the product and desired appearance, an appropriate finishing system may include water-based polyurethane, another compatible lacquer, or an approved oil-based treatment.
Some finishes require additional preparation or restrictions.
Always follow the coating manufacturer’s specifications regarding compatibility, application, ventilation, and curing.
Step 5: Allow Proper Curing and Protect the Floor
Avoid placing furniture or rugs back onto the floor before the finish manufacturer permits it.
Protect the renewed surface with suitable furniture pads and cleaning products
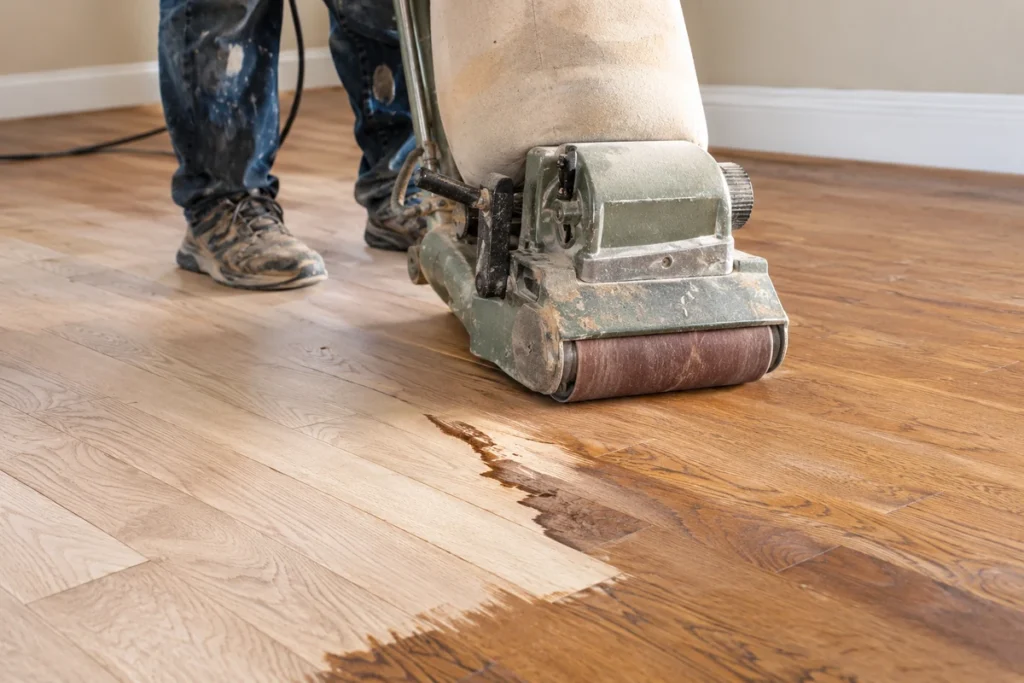
Why DIY Sanding Can Be Risky
Even sandable engineered wood flooring can suffer permanent damage from incorrect sanding.
Common risks include sanding through the veneer, creating uneven surfaces, damaging bevels, and applying incompatible finishes.
Unlike solid hardwood, engineered boards provide limited room for correcting mistakes.
Professional refinishing is therefore the safer option, particularly when the wear layer is close to the minimum recommended thickness
FAQs
Can you sand engineered wood floors yourself?
Technically, yes, but DIY sanding is not recommended without sufficient experience and verified wear layer thickness.
Incorrect equipment, excessive pressure, or uneven sanding can expose the underlying core and permanently damage the floor.
For minor scratches, a compatible surface repair or recoating treatment may be more practical
Can floating engineered wood floors be sanded?
Yes, some floating engineered hardwood floors can be sanded, provided the manufacturer permits it, sufficient wear layer remains, and the installation is stable.
However, floating boards can move slightly under sanding equipment, increasing the risk of uneven results.
The locking system, underlay, plank movement, and overall condition should be assessed before refinishing.
Floating installation alone does not determine whether an engineered floor is sandable
Can you change the colour of engineered wood floors by sanding?
Yes, changing the colour may be possible if the wear layer is sufficiently thick and the existing finish can be removed safely.
Once suitable hardwood is exposed, a compatible stain or finishing system may create a different appearance.
However, wood species, original treatments, surface texture, and remaining thickness influence the results.
Some factory-created colours or textures cannot be reproduced through conventional sanding and staining. Test the intended finish on a sample before proceeding
coclusion
Engineered hardwood can be sanded and refinished, but only when its remaining wear layer and overall condition allow it.
A wear layer of approximately 2.5 mm is an important minimum assessment benchmark, not a guarantee that sanding is safe.
Before refinishing, verify the manufacturer’s specifications, inspect the flooring, and consider whether recoating or plank replacement would provide a better result.
For homeowners in Dubai and across the UAE, Greenwood can help you explore engineered wood flooring options and understand the maintenance considerations relevant to your space